
WWDC 2019 brought with it a whole host of new enterprise features for Apple’s OS’s, including macOS 10.15 Catalina and iOS 13. One of the most important in my opinion is called ‘Enrolment Customisation’. This is essentially a page during the DEP process where an MDM can present any web content. In our case, this was a perfect place to put a SAML authentication page.
We released our support for this feature in Workspace ONE UEM 1909 (our Sept 2019 release). All Workspace ONE UEM release notes can be found here.
Enrolment Customisation (or Custom Enrolment in the Workspace ONE DEP Profiles), is supported on macOS 10.15+ and iOS 13+.
Personally, this is something which I’ve seen holding up a more broad rollout of DEP across enterprise customers. Mainly for one, MFA is leveraged in many organisations today and the existing DEP authentication relied on an LDAP connection, meaning Username / Password only.
Also, any organisation who are leveraging Smart Cards or certificates for authentication require the use of a Single Factor Token which can be generated from the UEM Self Service Portal. The UX downside to this was the Token needed to be input in the username AND password box, a slightly confusing process for many colleagues.
So, now Apple has delivered us this feature and VMware has released the to code to on-premise and SaaS customers, let’s have a look at how to deploy it.
1) SAML AuthN via UEM
The first step is to configure SAML authentication within Settings / Enterprise Integration / Directory Services. You can choose how users can be authenticated, whether this is for Admins, Enrolment or the SSP or all at once.
In this example, we have integrated our UEM with Workspace ONE Access as the identity broker for our device enrolments.

Next step, we go into Access and configure the ‘default_access_policy’ for macOS. I wont go into detail in this blog, but you can follow:
- https://blog.eucse.com/workspace-one-okta-integration/
- https://blog.eucse.com/azure-saml-into-workspace-one-uem/
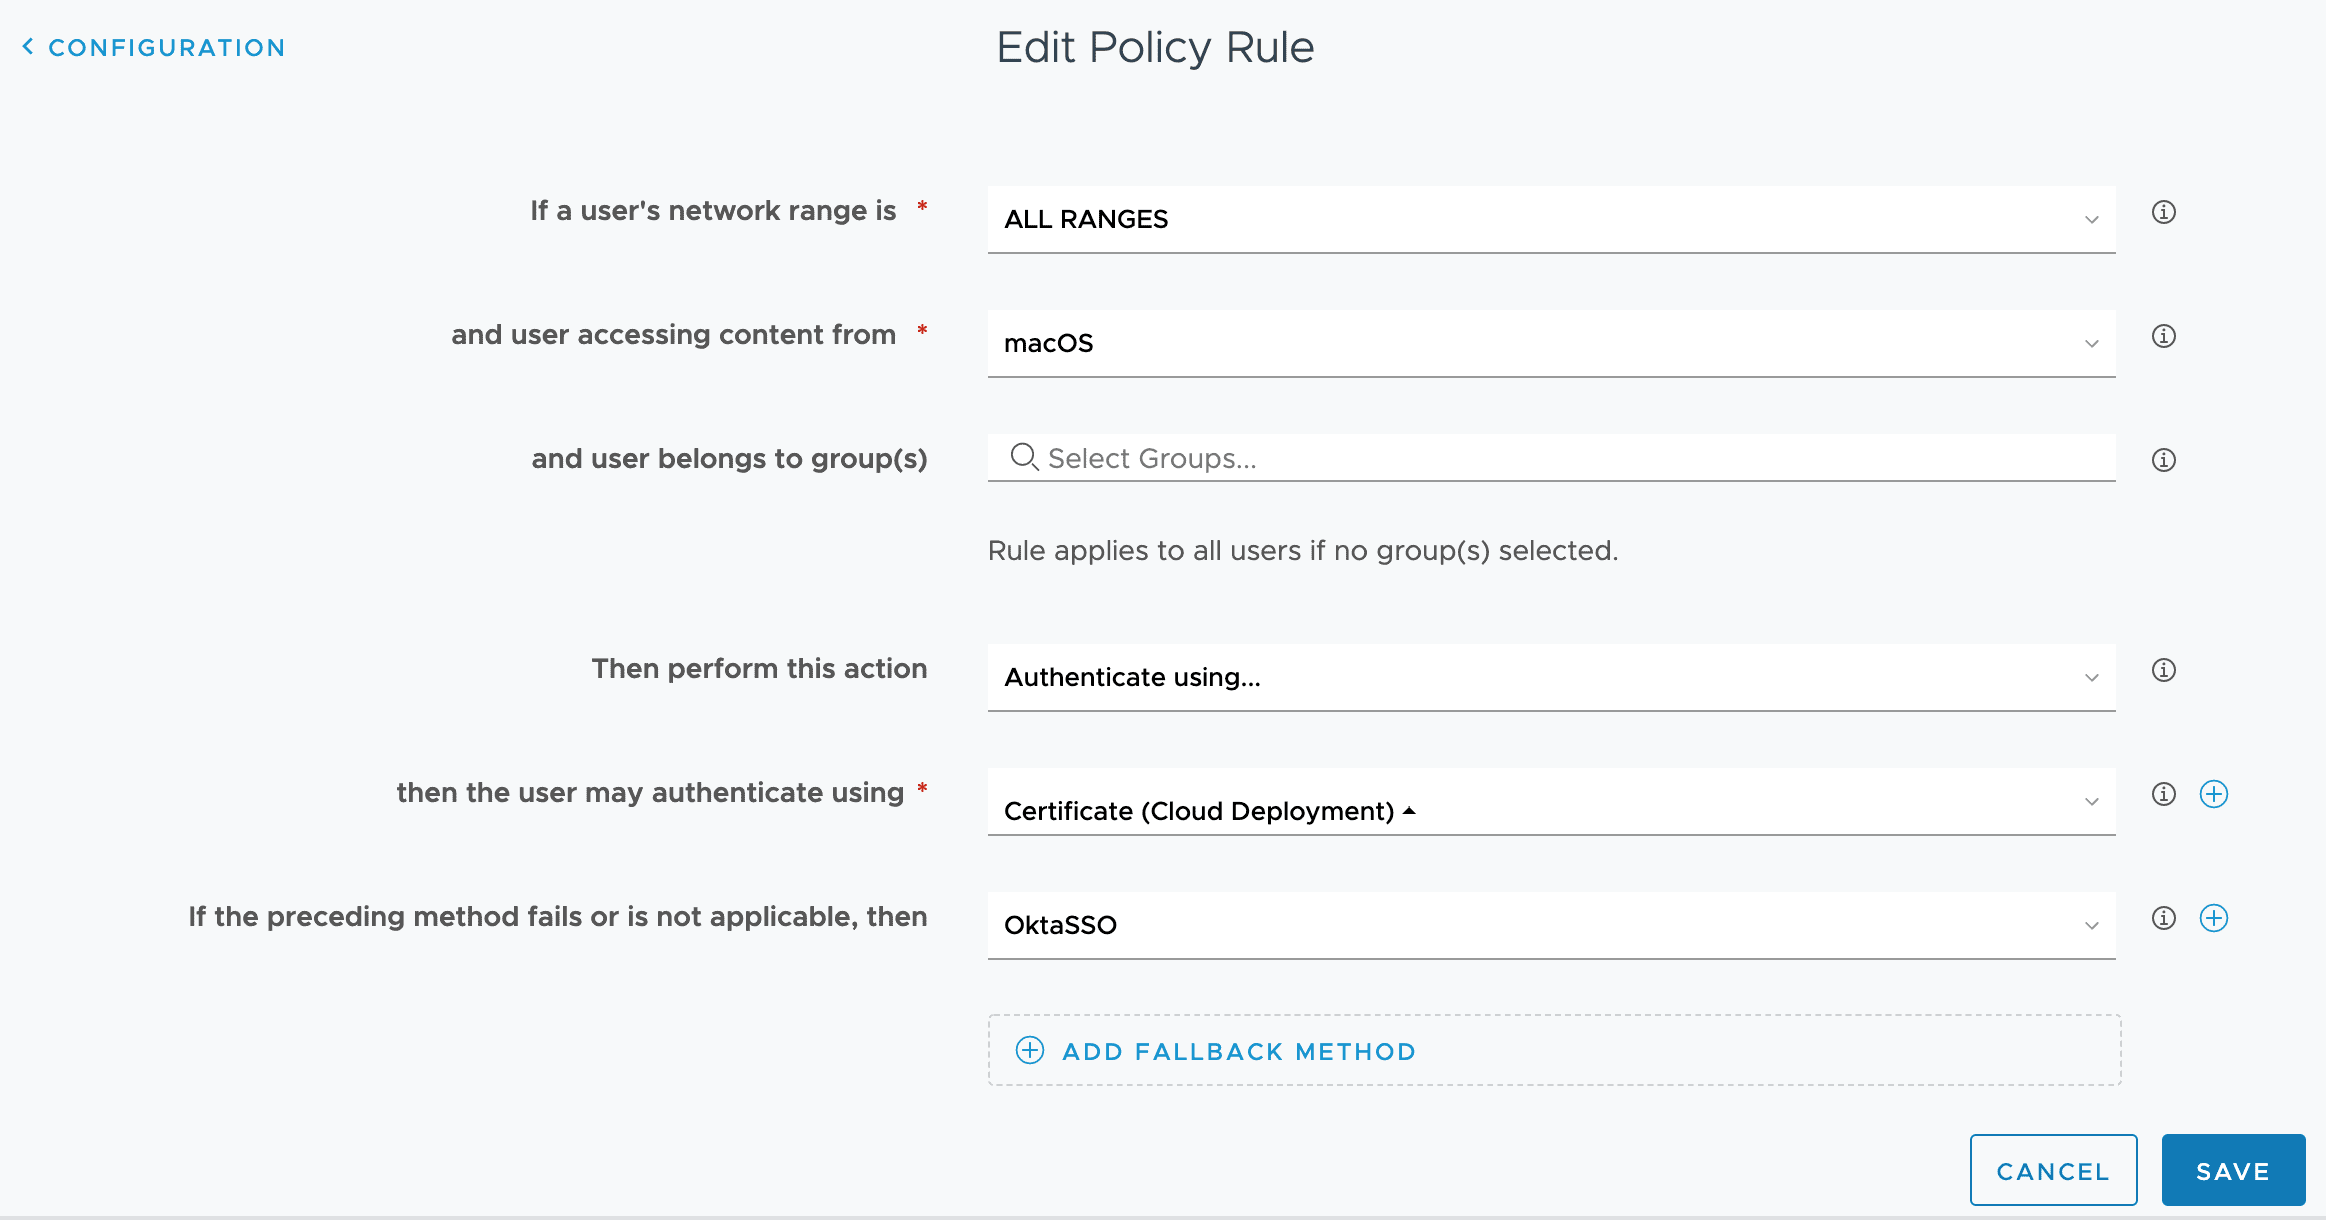
In our case here, we are performing Certificate auth with Access (Seamless SSO), and if we don’t have a cert yet (unenrolled), then we are sending our authentication to Okta.
As you can see, we can do more than just Okta with Access, we can hook into any SAML compliant Identity provider. We have other Access tenants, and AzureAD, we could also add Ping, JumpCloud and more into one tenant. This means IT has total flexibility over the ecosystem, and end users have a one stop catalog for ALL applications regardless of where they are federated.

The best way to validate your config is to authenticate to your SSP from a Mac. Head to https://yourds.awmdm.com/MyDevice/?gid=OGID
2) Configure DEP Profile in UEM
Once we have our UEM SAML authentication working, we can configure our DEP profile. Head to Settings / Devices & Users / Apple / Device Enrolment Program. If you dont have DEP setup yet, follow the steps to get started. If you have an existing DEP profile, there are only 2 amends to make for 10.15.

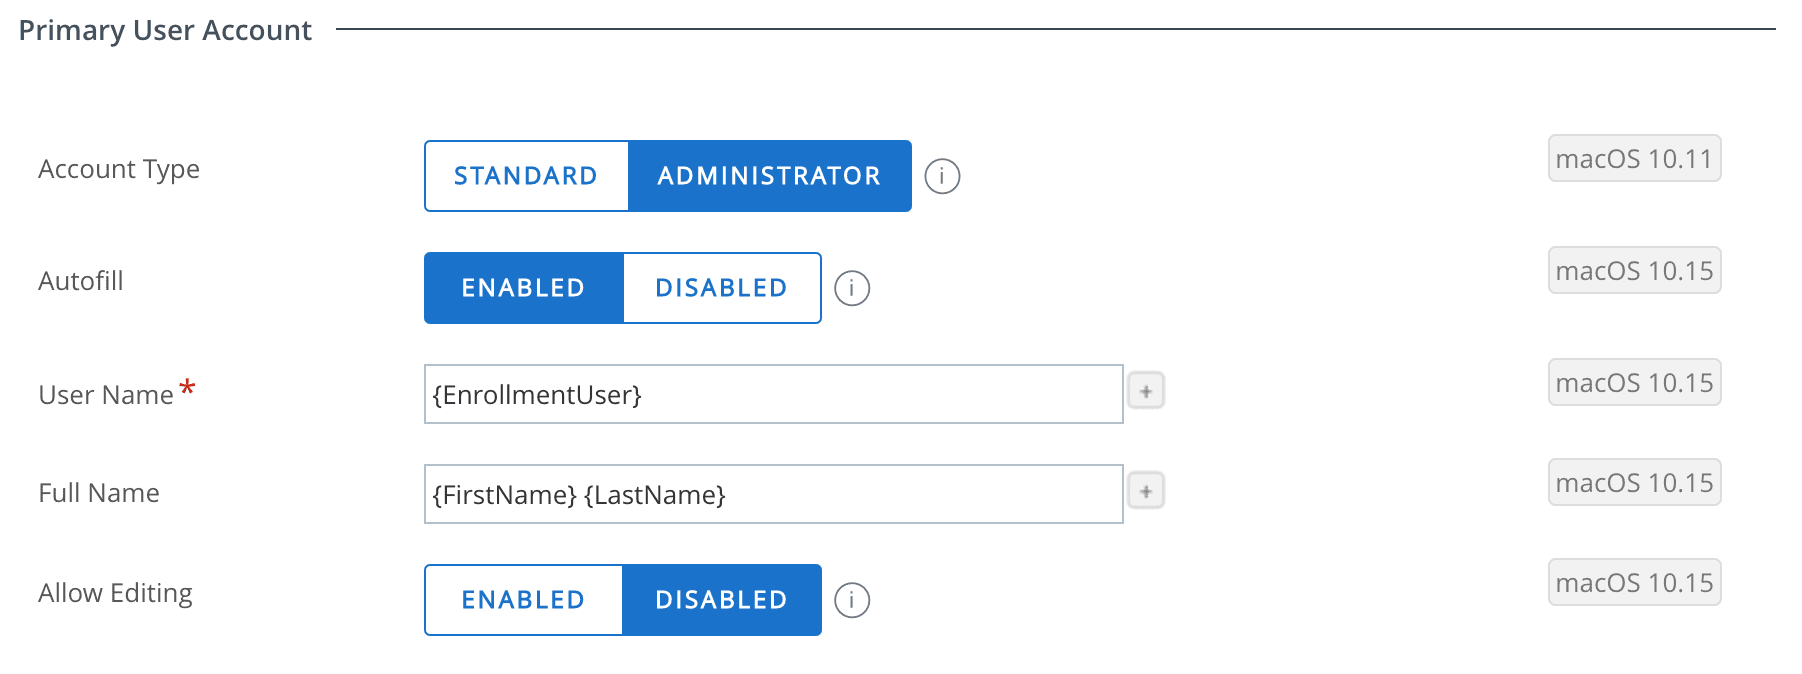
OPTIONAL: We can now pre-fill the Computer Account Full Name and Username based on account fields within UEM, based on lookups. You can also then prevent users from changing these details using ‘Allow Editing’.
Once this is complete, any new devices assigned to this DEP profile which are switched on after this change will be presented with the new experience.
See the following video for an example of the experience with Workspace ONE Access and with Okta Verify.
Please feel free to leave us feedback on this via Twitter, or contact us.

Solutions Engineer @ Okta. Former SE at VMware for Workspace ONE. All things Identity, MDM and Mac. Occasionally takes photos of Bands at adammatthews.photography, and blogs at adammatthews.co.uk.
macOS Custom Enrolment with Workspace ONE, Okta and more – Adam Matthews
December 6, 2019[…] Post first appeared on the EUCSE.com blog at https://blog.eucse.com/macos-custom-enrolment-workspace-one-okta/ […]
EUCSE One Year Anniversary! – EUCSE Blog
November 25, 2020[…] macOS Custom Enrolment with Workspace ONE, Okta and more […]
Evaluating Intune against Workspace ONE UEM: MacOS Edition - Mobile Jon's Blog
March 29, 2021[…] you saw in the video, the implementation of the great new Custom Enrollment along with the automated standard user account and managed admin account with a rotating password […]