
Updated 15th Aug 2024 – Wording on the SCEP options wthin Kandji has been updated.
Chances are, you or your company has a plan to go ‘Passwordless’ in the coming year. It’s been a long journey so far, with many different ways to achieve a ‘Passwordless’ authentication. We have the vendor Authenticator App with a push notification method, FIDO2 key like a Yubikey, and device based SSO as the main leaders.
In this blog, we’re going to go through how to combine Okta’s FastPass experience with Kandji to deliver a passwordless authentication on a managed Mac. This is enabled by delivering an Okta CA SCEP certificate to your endpoints via Kandji.
First, I just want to say, this process is insanely simple. I assume here you have an existing deployment of Okta and Kandji, and we’ll cover just how to hook the two together.
Okta FastPass is a feature within the new Okta Identity Engine platform that was released in November 2021. Okta screenshots you see are from an Okta Preview environment in Jan 2021.
I looked around for some docs for this but couldn’t find any, if anyone comes across any let me know (and if any are written up, I’ll update the post).
Okta Setup
First, in the Okta Admin console, head to Security > Device Integrations, you’ll land on the Endpoint Management Tab.
Click + Add Platform and you’ll see the below screen.

Copy the SCEP URL and Secret Key and keep them safe. You can rotate these later on if you need to get the Secret Key again (NOTE, I don’t know how this would impact an existing deployment if you rotate the keys later on, I still need to test that!)
That’s all you need in the Okta end for now, on to Kandji.
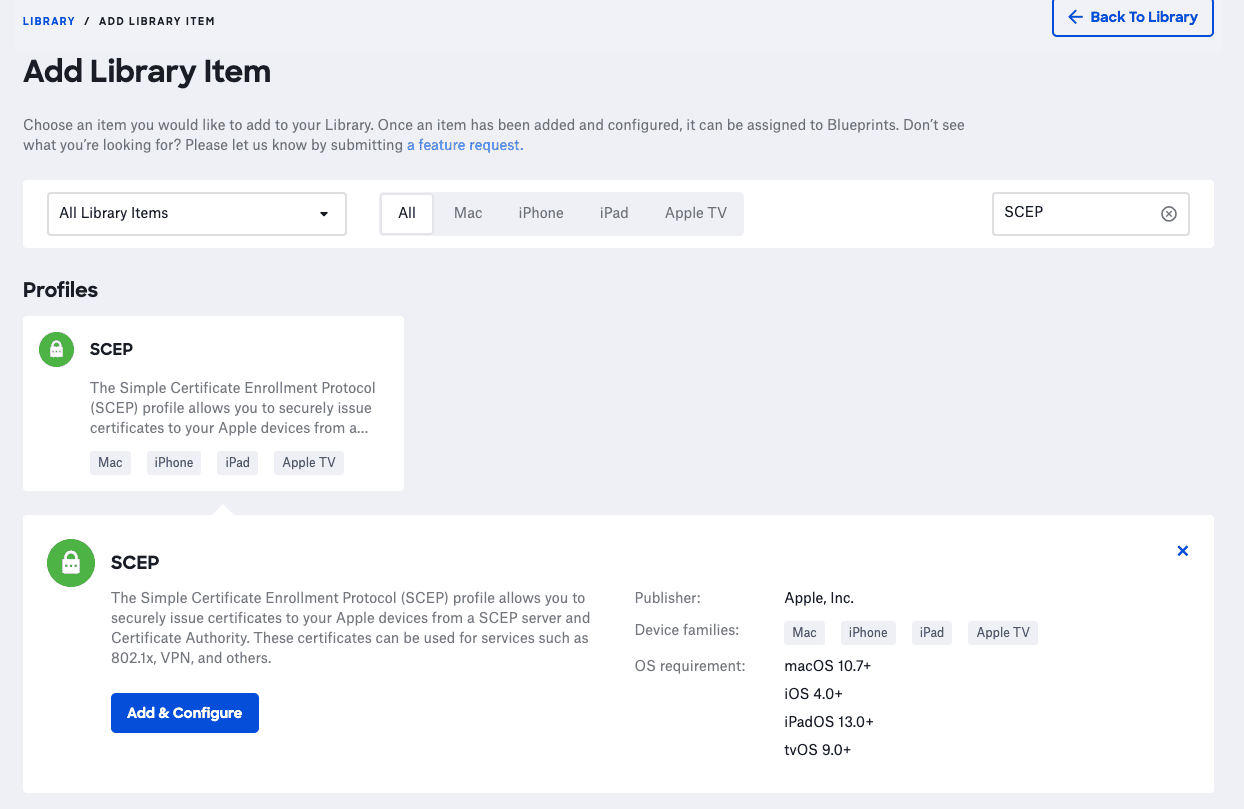
Kandji Setup
Head to the Library, and search for SCEP.
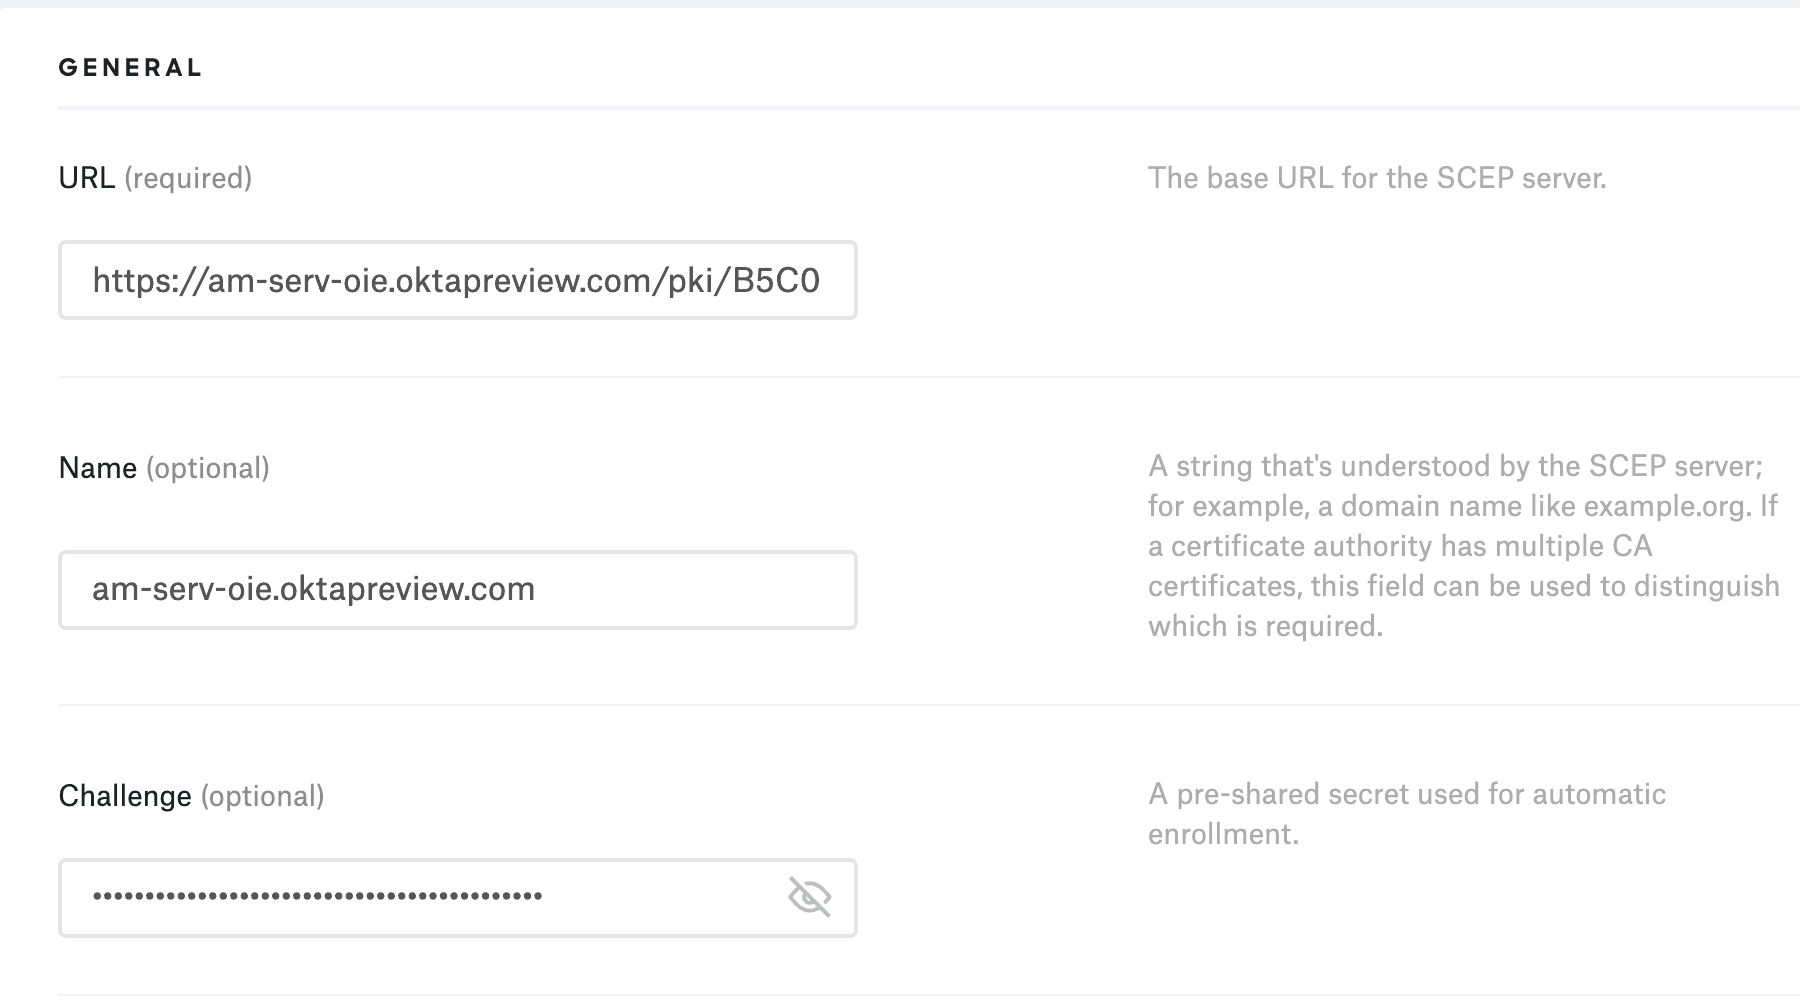
Give your profile a name, and then in the Settings > General section, enter the URL you copied from Okta, enter a name (optional, I used my tenant domain), and the Challenge is the Secret Key you copied from Okta.
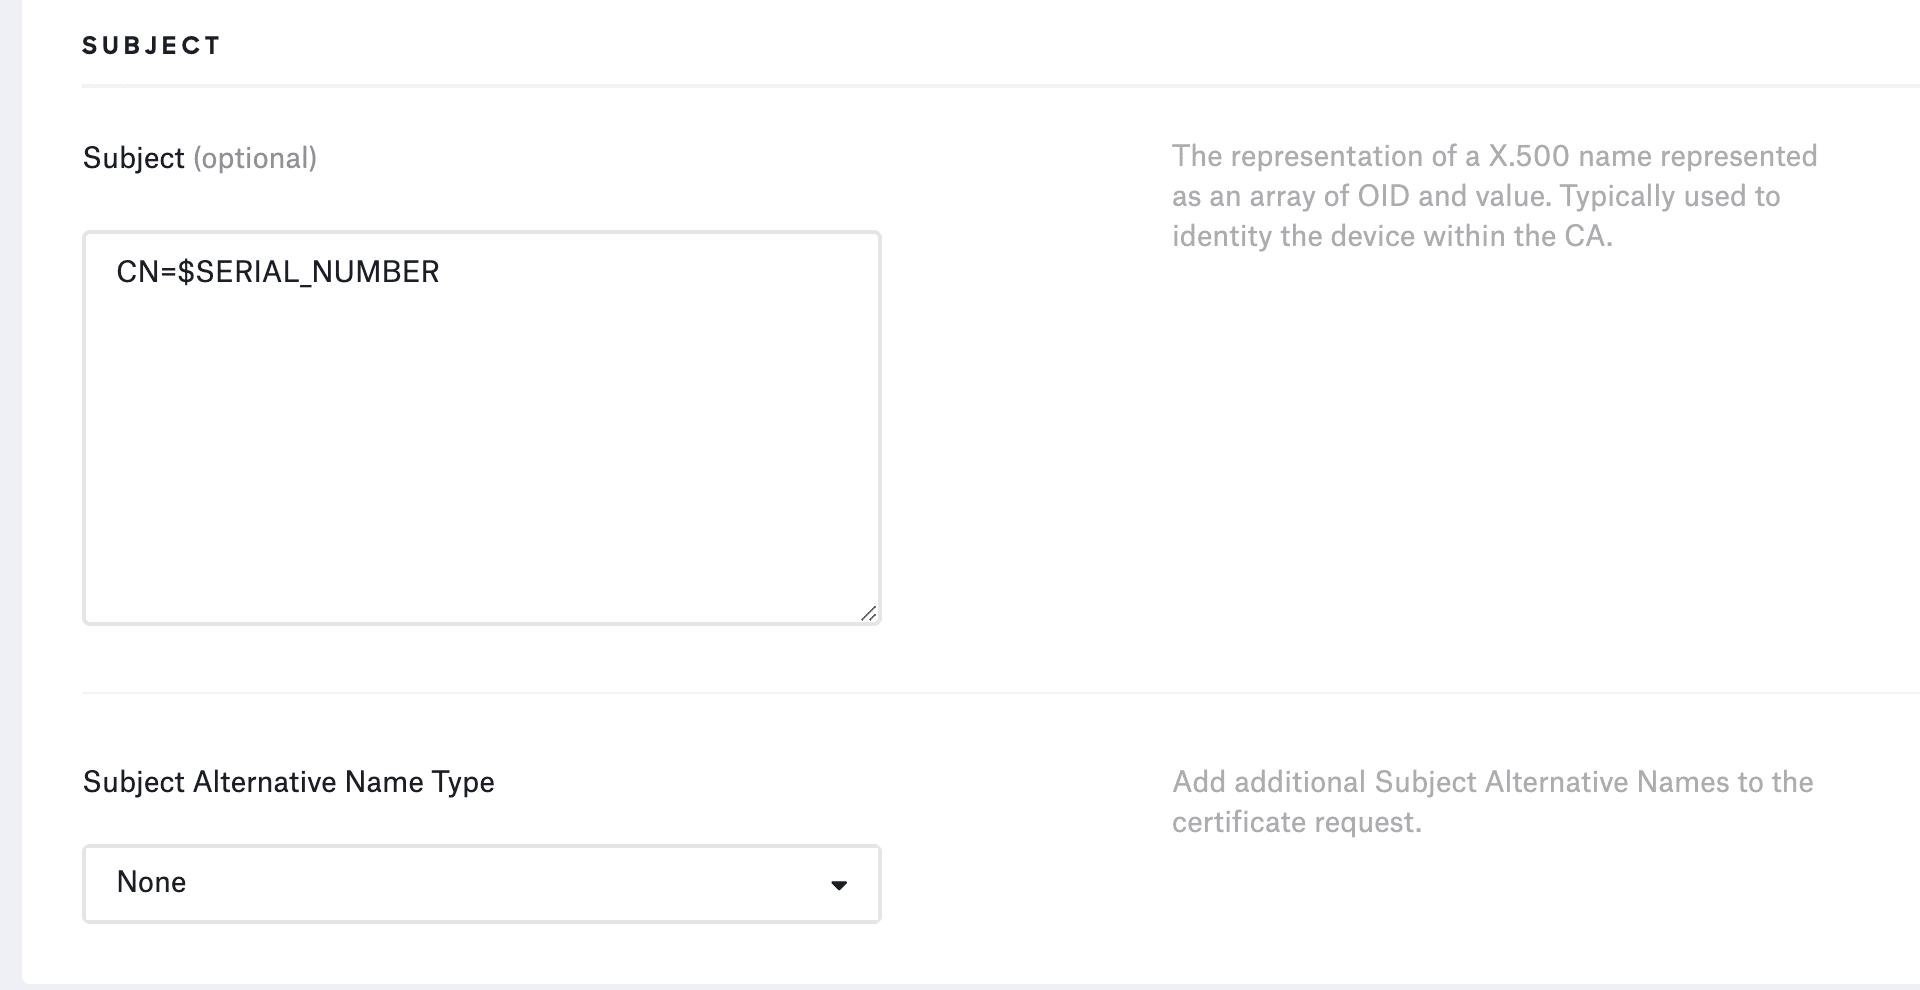
In the Subject section, I entered: CN=$SERIAL_NUMBER. This will set the Subject name to the Serial Number of the device. This helps when we look at the logs in Okta.
In the Key section, I use 2048 and Signing.

In the Options section, I used the below settings:

Save the Profile as normal. Next, you’ll need to go in and assign it to a Blueprint.

Once this is saved, a certificate will be requested from Okta and delivered to your endpoints.
What does this look like?
When you’ve got everything set up, you should see success logs in both Kandji and Okta.
Kandji should show you the below under the Profile Status:

In Okta, under Reports, System Log, you should see the following (you can search for “Issue client certificate”):

Next Steps
Having this cert deployed to your Mac will ensure when the user registers their Okta Verify App, it will mark the device as Managed. You can then set your Sign-On Policies to take a Managed device into account.

You can get Okta Verify from the Mac App Store and deliver via Apple Business Manager in Kandji. There are some App Config values you can set (I’ve not tested these yet).
https://help.okta.com/oie/en-us/Content/Topics/identity-engine/devices/managed-app-configs-macOS.htm
This is a great place to start with getting macOS Okta Verify setup. https://help.okta.com/eu/en-us/Content/Topics/end-user/ov-sign-in-macos.htm
Setup Okta FastPass
This process has been really well documented, so I’m not going to re-hash it here. I might update this post with more over time, but for now, head here and get going! https://help.okta.com/oie/en-us/Content/Topics/identity-engine/devices/fp/fp-configure.htm.
Please leave a comment if anything is missing or needs an update or more clarity!
References/Resources
Many thanks to Matthew Lee for helping keep this up to date!

Solutions Engineer @ Okta. Former SE at VMware for Workspace ONE. All things Identity, MDM and Mac. Occasionally takes photos of Bands at adammatthews.photography, and blogs at adammatthews.co.uk.