Microsoft Defender Application Control, (also known as MDAC) polices allow admins to control which applications can be run on a Windows 10 PC.
In this article there is some overlap with the Microsoft commands as my intention is to give you the quickest and easiest route to deploying a MDAC policy just using the information here and not to have to go searching for the MS/PS commands needed.
What’s going on with App Locker?
App Locker came with Windows 7, WDAC came with Windows 10 1903, it’s much more powerful and will be fully supported by MS going forwards, read more here: https://docs.microsoft.com/en-us/windows/security/threat-protection/windows-defender-application-control/wdac-and-applocker-overview

Overview:
For the purposes of this article, I’ll go through how to allow all Microsoft apps and Notepad++, anything else will give the above block message
We start with a template policy supplied by Microsoft, these can be found here: C:\Windows\schemas\CodeIntegrity\ExamplePolicies
Copy AllowMicrosoft.xml to a working directory of your choice, I use c:\mdacedits\
Note, we don’t edit these files directly, it’s all done using PS commands.

Each of these Rules has an ID/Number (not shown in the xml), see here for the full list: https://docs.microsoft.com/en-us/windows/security/threat-protection/windows-defender-application-control/select-types-of-rules-to-create
The only Rule we’ll discuss here is ‘3’ Audit Mode, when enabled this will not block any applications from running, instead it will record all actions into Event Viewer under:
Applications and Services Logs\Microsoft\Windows\CodeIntegrity\Operational
This could be useful to just Audit the device without blocking anything and then build a Policy based on the findings.
To enable the Audit Mode Rule:
Set-RuleOption –FilePath .\ AllowMicrosoft.xml -Option 3
To disable the Audit Mode Rule:
Set-RuleOption –FilePath .\ AllowMicrosoft.xml -Option 3 -delete
The policy we’re using here, AllowMicrosoft.xml, allows any app signed by Microsoft to run, anything else will get blocked.
Apps can be allowed based on a few different methods:
- Attributes of the codesigning certificate(s) used to sign an app and its binaries
- Attributes of the app’s binaries that come from the signed metadata for the files, such as Original Filename and version, or the hash of the file
- The reputation of the app as determined by Microsoft’s Intelligent Security Graph
- The identity of the process that initiated the installation of the app and its binaries (managed installer)
- The path from which the app or file is launched (beginning with Windows 10 version 1903)
- The process that launched the app or binary
Hands on:
- Configure the xml file
- Convert the xml file to a binary file
- Get the Base64 text from the binary file
- Deploy the Base64 using a UEM Custom Payload
All my files are in c:\mdacedits and I run all the PS commands in the same directory so I don’t need to put the full FilePath in the commands.
If present we need to remove the Audit Mode rule:
Set-RuleOption –FilePath .\AllowMicrosoft.xml -Option 3 -delete
Compile the XML to a binary file:
ConvertFrom-CIPolicy -XmlFilePath .\AllowMicrosoft.xml -BinaryFilePath .\AllowMicrosoft.bin
Get the Base64 from the .bin file:
[Convert]::toBase64String($(Get-Content -Encoding Byte -ReadCount 0 -Path .\AllowMicrosoft.bin))

Deploying the MDAC using a UEM Custom Payload
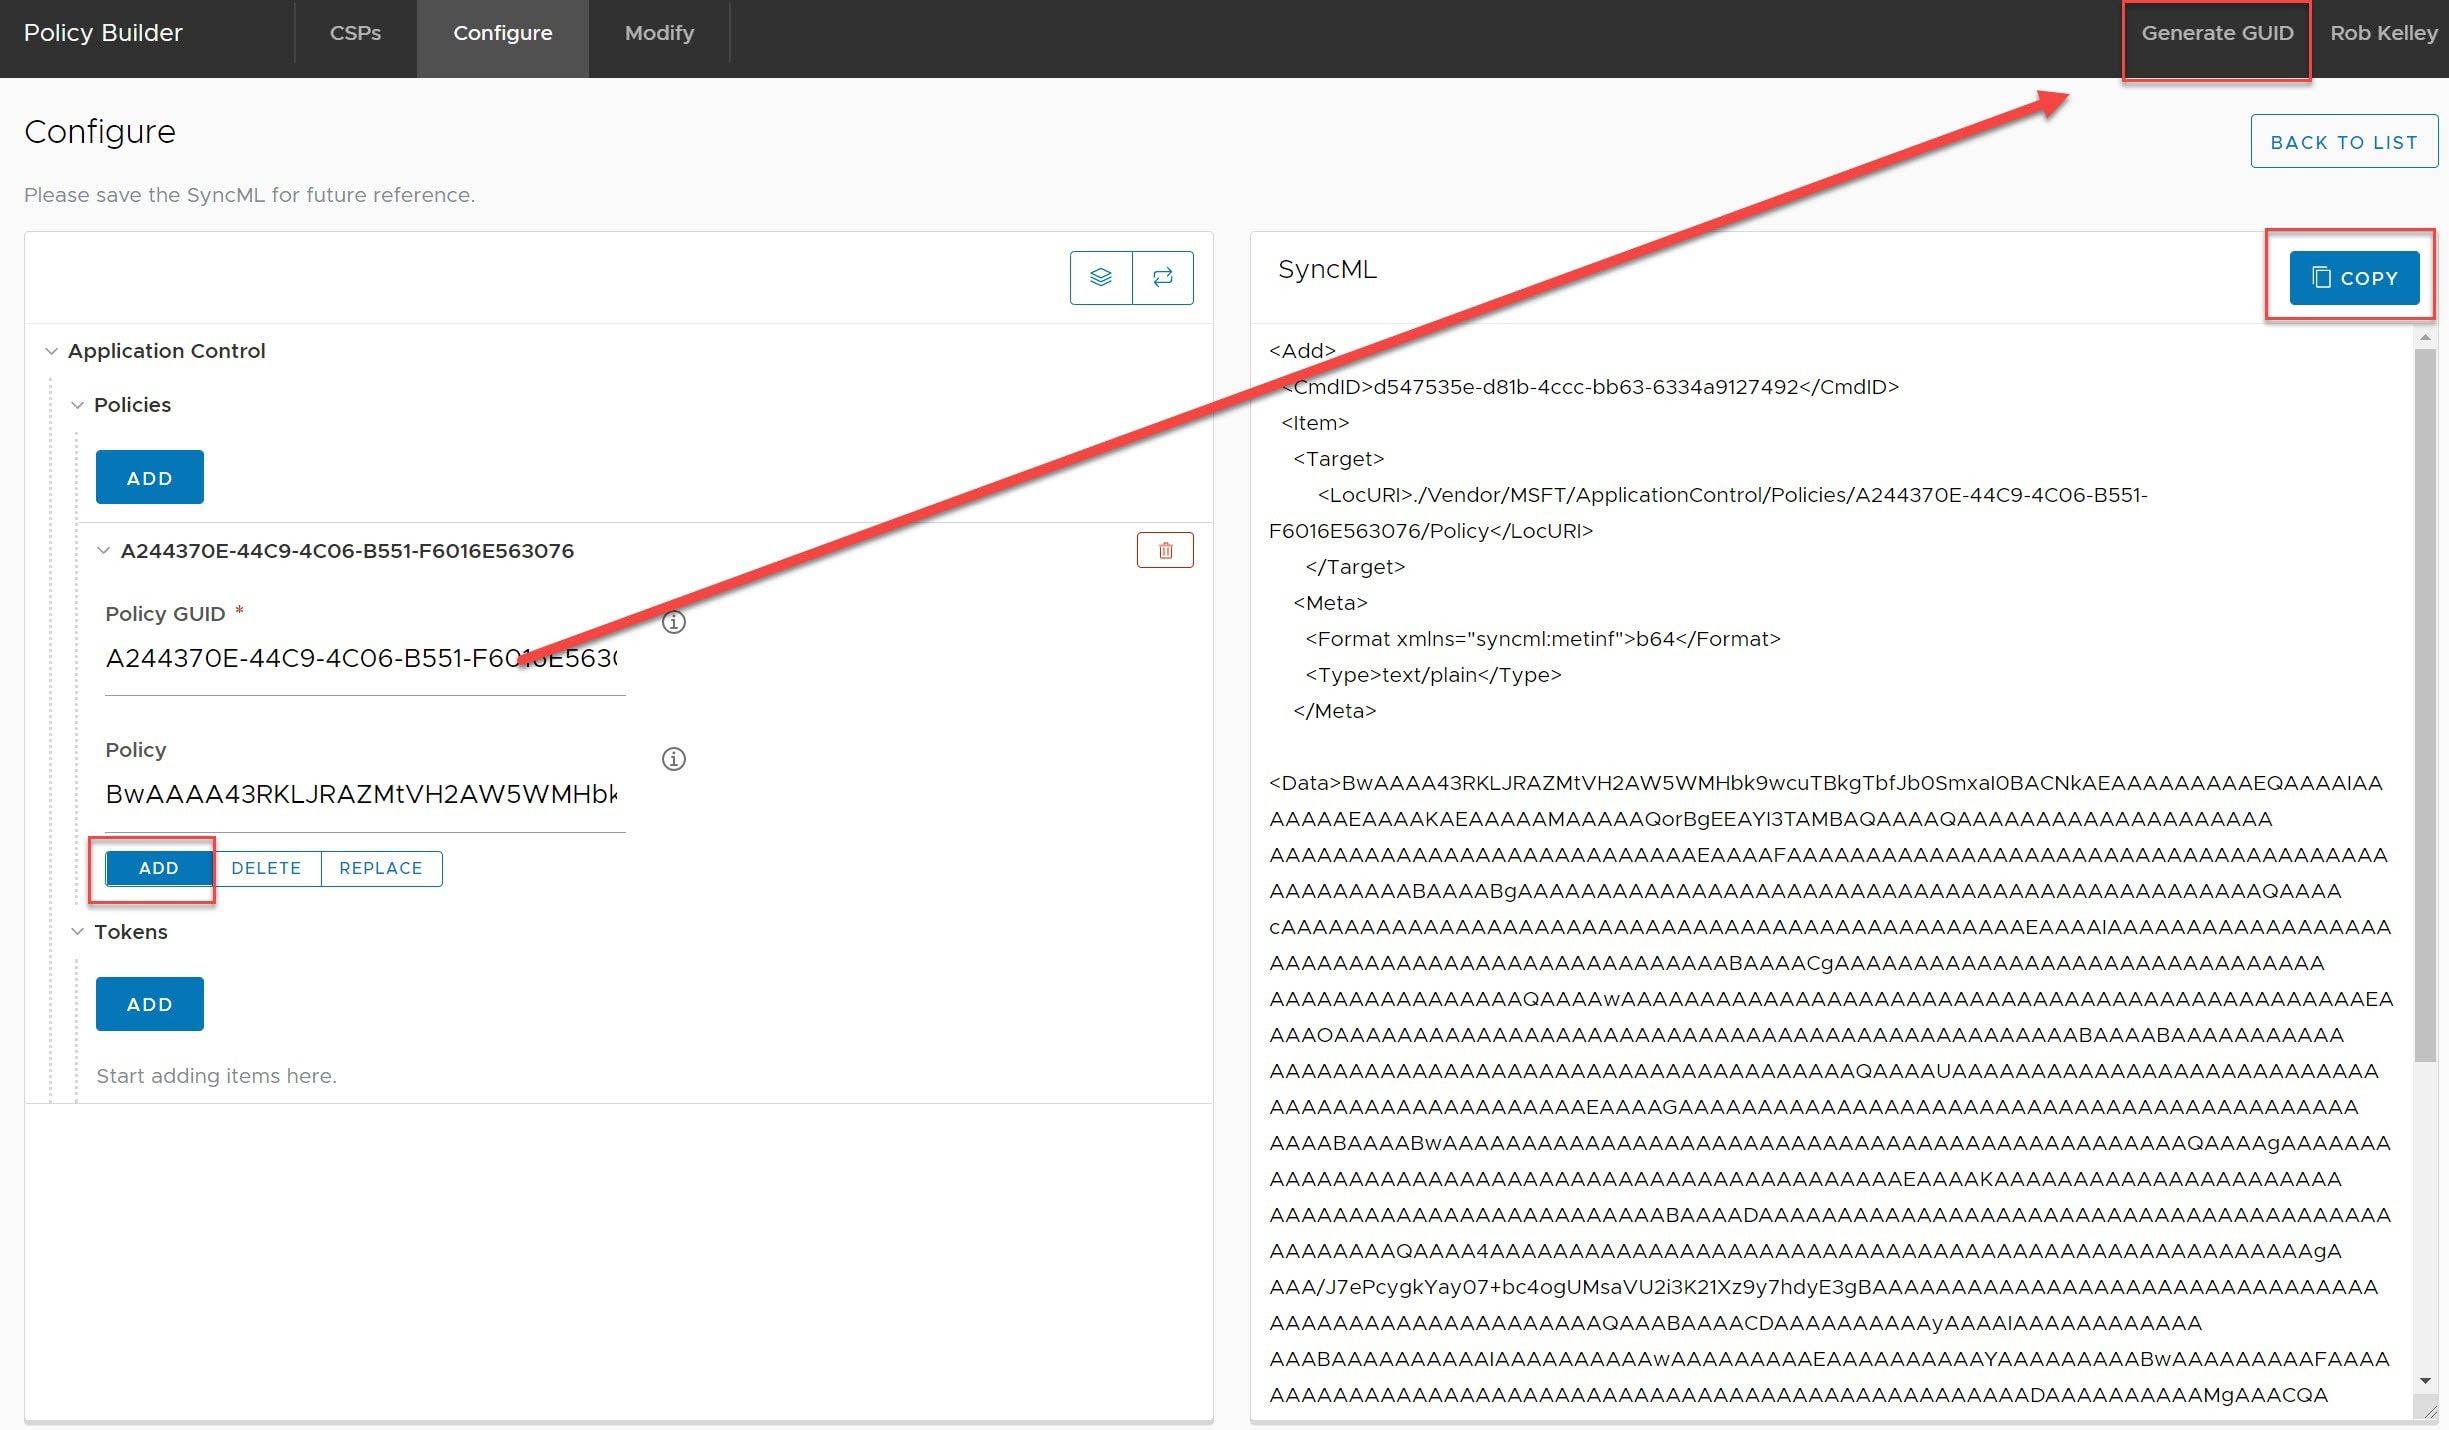
Head over to our Policy Builder: https://www.vmwarepolicybuilder.com
- Select ‘Application Control’ and hit ‘Configure’.
- Under Policies, hit ‘ADD’,
- Generate a new GUID,
- Paste the Base64 output into the ‘Policy’ field,
- Ensure ‘ADD’ is selected,
- Hit the ‘Copy’ button and paste into a new ‘Custom Settings’ payload:
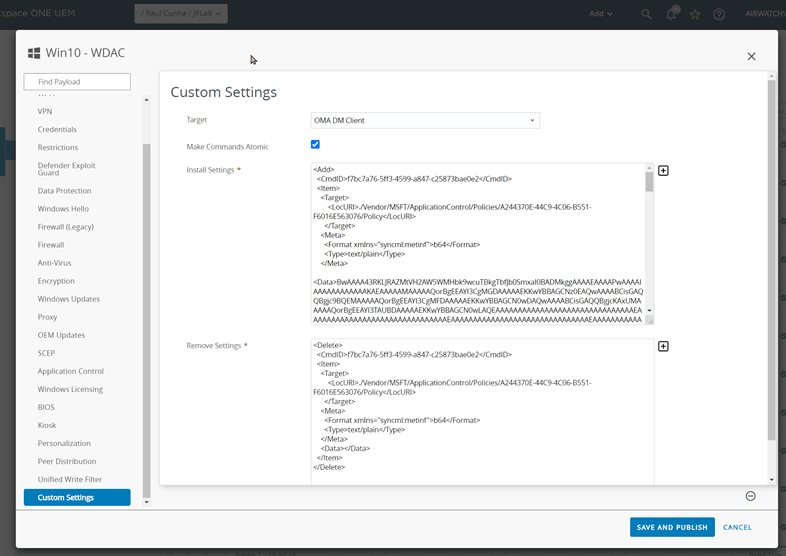
Then go back to the Policy Builder and change the config from ‘ADD’ to ‘DELETE’ and copy the SyncML into the ‘Remove Settings’ field in the UEM profile:

Now we’re ready to publish the profile to a device, once it’s landed on the end point, we can check it has applied by trying to run a non MS app such as Chrome or Notepad++, also check in: C:\Windows\System32\CodeIntegrity for a file called ‘SIPolicy.p7b’ < this is our policy config.
The settings take effect straight away, no reboot needed, if you want to remove the policy then delete the above file and reboot.
Tip: Don’t try and build and extract the Base64 on the same machine you’re deploying to as you will get errors.
Merging multiple policies
Now we have a policy that blocks anything that isn’t signed as Microsoft, but we want to allow another publisher, in this example Notepad++, to do this we need to add a FilePath Rule to a new policy.xml and then we will build a new policy.xml file by merging both the AllowMicrosoft.xml and AllowNP.xml into one xml.
The first command creates the rule into memory, the second creates a rule variable, the third writes it to a new policy file called AllowNP.xml.
Note it’s a wildcard entry, we could enter notepad++.exe but then we may have errors when loading other runtime files.
- New-CIPolicyRule -FilePathRule “C:\Program Files (x86)\Notepad++\*”
- $rules = New-CIPolicyRule -FilePathRule “C:\Program Files (x86)\Notepad++\*”
- New-CIPolicy –FilePath .\AllowNP.xml –Rules $rules
- Set-RuleOption –FilePath .\AllowNP.xml -Option 3 -delete
You should now have a new policy called ‘AllowNP.xml’ without Audit Mode, now we merge this and the AllowMicrosoft.xml file into a new .xml file:
Merge-CIPolicy –PolicyPaths .\AllowMicrosoft.xml, .\AllowNP.xml –OutputFilePath AllowMSandNP.xml
We now create a new .bin file in the same way we did the single policy above:
Merge-CIPolicy –PolicyPaths .\AllowMicrosoft.xml, .\AllowNP.xml –OutputFilePath AllowMSandNP.xml
and extract the Base64 into a UEM Custom Settings profile as explained above.
Now we can run MS apps and NP++ but nothing else.
Tip:
When installing new Win32 Apps make sure you have allowed them to run first else the install will fail, add them to the Policy before deploying.
Allowing Workspace ONE HUB to run:
Depending on your deployment, you may need to whitelist the Workspace ONE files:
C:\Program Files (x86)\AirWatch*
C:\Program Files\VMware\SfdAgent*
C:\Windows\System32\AirWatchMDM.dll

Senior Solutions Architect
Saturday Link Roundup–Windows Defender Application Control – wisefaq.com
July 24, 2021[…] Deploying Windows 10 WDAC Policies using Workspace ONE […]